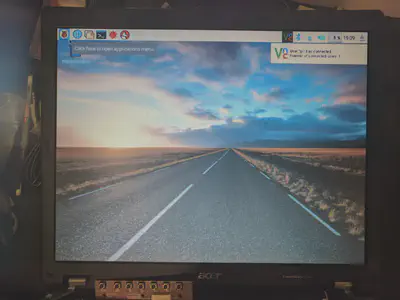
Acer Travelmate 4150 retrofitting to Raspberry Pi Laptop: Part 2 – Working LCD and Raspbian

Explanation on setup
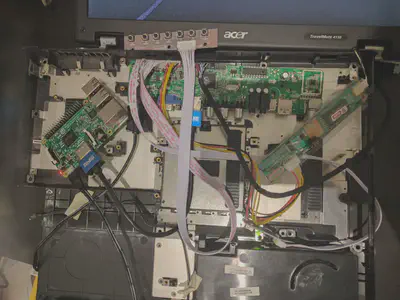
I finally got the LCD LED controller. I spent some time to understand a bit better how it works. So basically from the LCD controller there is a connector with red/yellow/black lines going to driver board, which is needed for this old types of LCD monitors. From there it is connected with two cables to monitor itself.
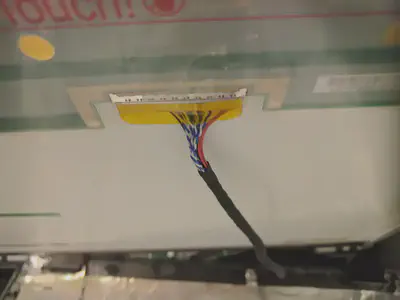
The cable covered in black thicker part which combines several cables blue-whites and red ones, goes to the back of LCD display as can be seen on the picture lower down. This LCD controller also features a really neat control panel with which you can change the channel (HDMI,VGA etc.), change brightness, and all the casual things you may care about more then me.
And there is a normal size HDMI cable connected to Raspberry Pi 3 and LCD controller. The configuration needed which is fairly straightforward is described bellow.

Something I’d really like to add here on practically and as well difficulty of the build is that as a concept it is a very good idea, this mini project of mine, but I think at the end there may be quite a bit of problem fitting everything together, my biggest worry being the battery fitting in the case.
But if we look positively at it, LCD controller needs 12 and Rpi 5V. Optimally if you want to make life yourself easier (and reuse the battery pack if needed another time.) I went for 30000 mah battery pack that has 1 DC in 1 DC out (for charging the pack and output to LCD controller) and USB connector for raspberry pi. The choosen battery pack has: Output: DC 12V(5A MAX),16V(3.75A MAX),19V(3.15A MAX), USB1 5V/2.1A and USB2 5V/1A.
Which means it’s absolutely perfect. Higher amperage and voltage could be useful with another project and 2A 5V output is perfect for raspberry and 1A i guess you could use for charging something else such as maybe a phone or whatever.
At the moment I am in progress of trying to figure out the best way to connect the default keyboard, cause i am afraid I damaged it in the process of trying to hook it up. As an alternative I can always go bluetooth, but i’ll try to figure out a solution for it. Also on the Hacker news thread there were some good suggestions with discovery program on linux to configure a keyboard after you are able to hook it up.
Also while doing this particular project I noticed the amount of spare parts i have in general, and came to an awesome idea of making so called “Booktop”. Taking a bit bigger then 7 inch book with hard covers, cutting the paper a bit, insert TFT screen with raspberry Pi Zero W and small LCD controller inside, and adding a Bluetooth keyboard on the other side of the book. Voila, all of the sudden you have book on the outside, but whole world of information on the inside.

Raspberry pi preparation
For preparation of Raspbian image I have used a tool called PiBakery which makes it a breeze to quickly create needed images with certain configurations. You can take a look at one of my articles describing it’s usage or at their official website here.
Screen resolution: Configuration change needed for Raspbian to fit this particular screen. Go into terminal and enter following command:
nano /boot/config.txt
Change framebuffer_width to 1024 and framebuffer_height to 768. Also uncomment in case you have it commented out.
I also had some issues with outputting to HDMI and would strongly recommend changing hdmi_force_hotplug value to 1 from 0.
After that save and exit,restart raspberry pi and you should be able to output via HDMI.
Items I bought:
1.) LCD LED controller from Ebay: http://www.ebay.co.uk/itm/112217998323
2.) Due to length of the cable being to short I was forced to buy a longer one. If you want to know exactly what kind of cable you need it’s: 25 inch LVDS Cable 30 Pin 1 ch 6-bit FIX-30P-D6 For LCD Controller to Display. The most important part of this spec is FIX-30P-D6 which describes the connector etc.
Item I am still waiting for (battery):
3.) High Quality 19V, 5V,12V,16V,30000MAH LiPo USB Batteries for Laptop