docker-compose Jenkins with persistent data

This guide will focus on the local environment for now, but should be easy to adapt to higher env’s. The focus of the guide is how to run Jenkins image, add changes to it, and load then on next start.
Create a following file on your local machine and go to that location in the terminal.
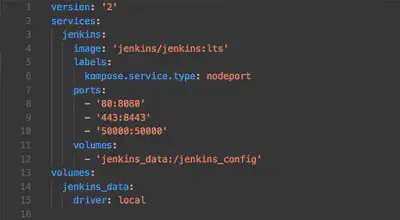
docker-compose.yaml file:
services:
  jenkins:
    image: 'jenkins/jenkins:lts'
    labels:
      kompose.service.type: nodeport
    ports:
      - '80:8080'
      - '443:8443'
      - '50000:50000'
    volumes:
      - 'jenkins_data:/jenkins_config'
volumes:
  jenkins_data:
    driver: local
Under services: we define which image is used. I used the one from Docker hub located https://hub.docker.com/r/jenkins/jenkins/. Under tags you choose your own version but I prefer running on LTS at least while testing locally.
Kompose.service.type is used so it is also kompose compatible.
The volume is perhaps the most relevant in this case since we define the name & location of the volume hard as jenkins_data:/jenkins_config as well as defining type of driver used for volume.
Cool, we have a nice yaml setup. Now in the terminal we execute
docker compose up
to fire up with the correct image etc. Now the actual jenkins should be available.
To check for your password that you will need for the first time check first which container id is associated with your newly ran container.
You can do that with:
docker ps
To actually check the logs use:
docker logs CONTAINER_ID
In the output of the above command you should see message like
*************************************************************
Jenkins initial setup is required. An admin user has been created and a password generated.
Please use the following password to proceed to installation:
After going to the local Jenkins URL, setting up plugins etc. you can use
docker-compose stop to persist data on the data volume.
And upon next start simply use docker-compose start for it.
This is hopefully an easy and straightforward setup for anyone wanting to focus a bit more on CI/CD specific case.